Written by Ouss Mezher
Freebie: Why use the “Pattern Builder Kit”
GO TO THE END OF THE PAGE TO DOWNLOAD THE FREE BRUSHES
Forced by the limited time I had to create pattern design, I was creating layouts to help facilitate my design process, but they needed tweaking, despite that they helped me in my work; but still I was wasting precious time that I have, and to top it all it wasn’t so precise.
Then I had the chance to take the “Digital Product Secrets” course with Aurelie, I learned a lot and from the brainstorming guide that she gave us I realized that my system can work faster and cleaner and MORE precise if I made brushes out of them, and as I was at it I researched to have more shapes to add to my kit.
So the “Pattern Builder Kit” was created, this kit acted mainly as a guide to help make the creation process of pattern designers as easy as possible and remove the time wasted in building layouts.
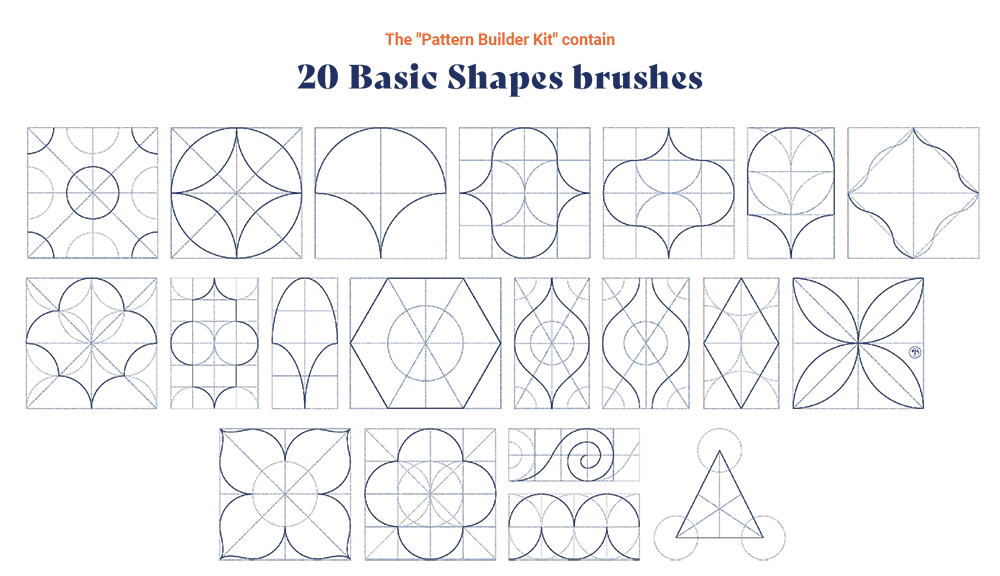
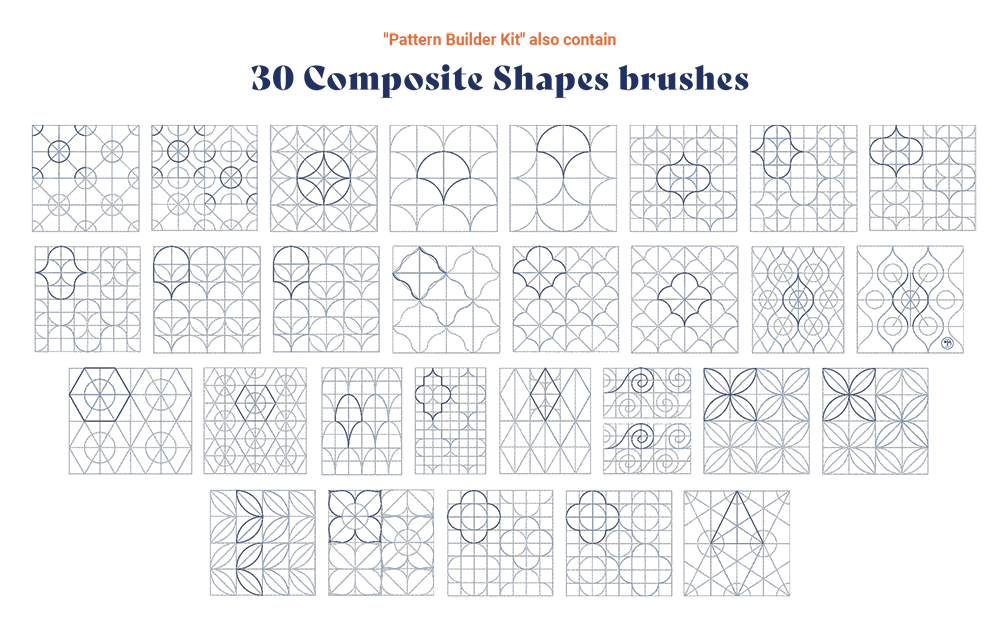
The complete “Pattern Builder Kit” contains:
20 basic shapes from the most popular “Diamond shape” to more traditional shapes and another 30 composite from these shapes to create a repeat and a half drop layouts all these brushes act as a detailed guide to help create unique patterns.
It’s Simple and easy:
Upload the brushes*.
*I will add a pdf file to the freebie on how to install the brushes in procreate..Select a brush/shape , adjust its size.
I usually click as big as I can use, click ONCE in the center of my canvas select transform tool while the uniform option is on I click fit to canvas option.

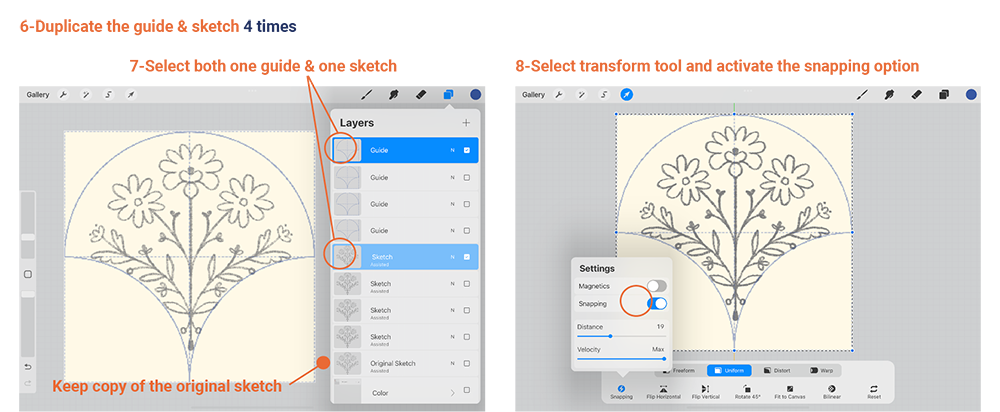
I duplicate the guide brush and the sketch 4 times, while keeping an original copy hidden.
Select transform tool and make sure the snapping option is on.
Move the 2 selected layers and snap them to the corner of your canvas.
Do that to all 4 copies.
Note: An orange guide will show to indicate that the snapping is working.
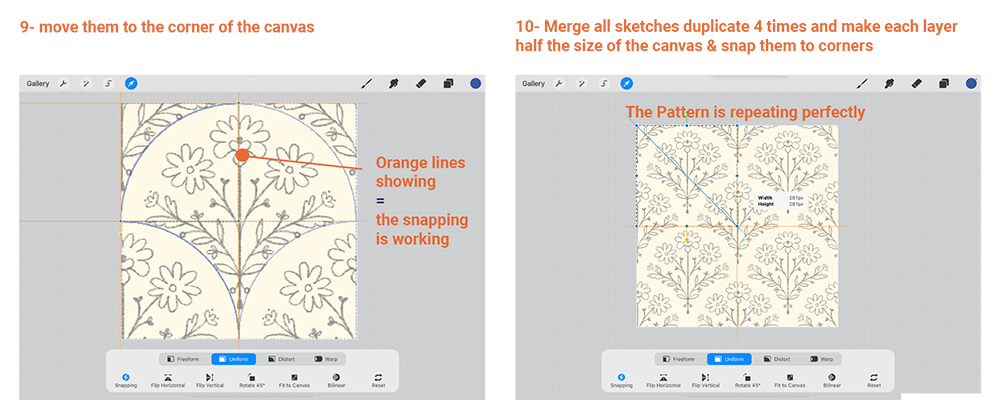
Merge the centre sketch with the 4 sides into one layer.
Duplicate the layer again 4 times and make each layer half the size of the canvas and snap each layer to the corner.
And here you see how your design is repeating
Now start colouring and repeat the process!
